Access Restriction in a Canvas App Using a SharePoint Group and Power Automate
In this Power Apps Tutorial,
We
will discuss how to restrict users from accessing certain features in a canvas
app, while other users can still see and use features.
How
to use SharePoint action in Power Automate to authenticate a user.
Why to Restrict Access?
In
any App, there’s always more than one type of user. For example, there will be
customers, staff, administrators, in business management application. An
administrator will have access to everything meanwhile, staff will have limited
access however a customer can only access his data.
Therefore,
we need to make sure that we restrict users from interacting with specific data
or features. For example, using Power Automate, we can hide anything in our
Canvas App from users so that they do not interact with it. With the help of
SharePoint group we will come to know how has access and who does not.
1.
Create a SharePoint group.
Navigate
to SharePoint site click on setting and site permission.
Next click on Create Group
A New window will get open please Name and About Me Description, Owner, Group Settings, Give Group Permission to this Site.
After creating the group, add a user to it.
2.
Create
a Flow to Authenticate Users
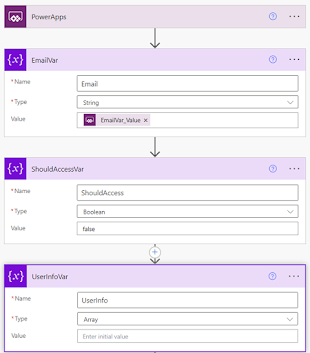
Create an instant flow with PowerApps as a
trigger and add three variables.
Email: This will be an input from the
canvas app.
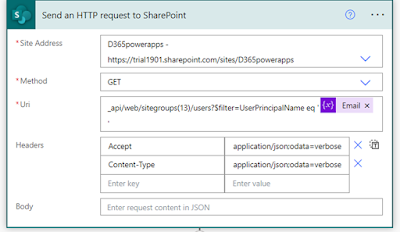
User Info – We’ll store user information
that SharePoint API will fetch.
Should Access – This will initially be
false.
Now let us add a condition where we will
check if the result is empty or if it returns the information about a user.
In the 'value' property of the 'Condition,'
add an expression. This expression will extract the length of the 'results'
array from the http response.
Expression:
length(body('Send_an_HTTP_request_to_SharePoint')?['d']?['results'])
Hide
Elements in the Canvas App Using Global Variables
Select
your current screen -> Action -> Power Automate -> RestrictingAccess
Now
in the formula bar of 'On Visible' property, add this formula:
Set(CheckUser,
RestrictingAccess.Run(User().Email));
Set(
IsVisible,
If(
Lower(CheckUser.shouldaccess) =
"true",
true,
false
)
)
Set(IsVisible)
is another global variable we are using to check if the response is true or
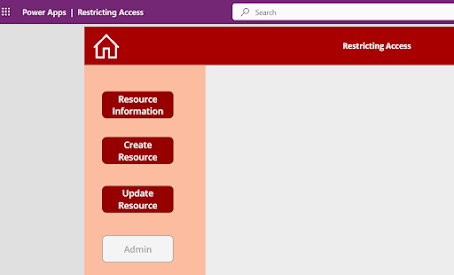
false. We will use this variable on Admin Button to hide it from staff.
In some scenarios where you don’t want to hide the features entirely from the user but also want to restrict them from using them. In such a case, you can use the DisplayMode property of the admin icon.
If(IsVisible,
DisplayMode.Edit, DisplayMode.Disabled)


Comments
Post a Comment